![PNG Transparent background-1.png]](https://support.cibolabs.com.au/hs-fs/hubfs/PNG%20Transparent%20background-1.png?width=215&height=76&name=PNG%20Transparent%20background-1.png)
MyFarm Mapper User Guide Contents:
MyFarm Property Mapper - How do I:
(CLICK ON LINKS to be directed to the area of support)
- Complete OnBoarding Properties?
- Create paddocks on my map?
- Attribute paddocks on my map?
- Create property features on my map?
- Print a map?
- Support resources & support centre?
Note: To ensure your map is fit for your purpose. Ensure you follow and complete workflow guides 1 to 4 (as shown in LINKS ⬆️ above) in order. This ensures your map is ready to print, export, and use in MyFarm Key, Pasturekey Services, Pasture biomass mapping and woody vegetation or project mapping.
1. Onboarding Properties
A). To create a property boundary base layer map
Quick steps will include:
- Open menu '1. Farm Onboarding'
- Filter and Zoom to QLD property - using the Filter widget (funnel)
- Click the Smart Editor widget (light bulb + pencil) - and select the Create Property icon.
- Then select the Copy by rectangle from the dropdown (default is 'New Polygon')
- Then move the mouse into the map area and draw a box around the remaining red polygons (QLD Rural Properties)
- Another panel show with all the selected polygons, ensure only the QLD Property option is ticked (un-tick the other group layers)
- Then click Create Multi-part feature.
- Check all attributes, then click SAVE
NB: The system will automatically add STATE, LGA and Property Name.
When creating the Paddock baseline (before you move onto the 2. Property Mapper menu), follow steps 3 to 8 for the Create Paddock option with Smart Editor.
b). To create property paddock base layer/Line maps
Quick Steps are:
- Ensure you have opened the tab – 1. Onboarding
- Click the Smart Editor widget (light bulb + pencil) - and select the Create paddocks icon.
- Then select the Copy by rectangle from the dropdown (default is 'New Polygon')
- Then move the mouse into the mapping panel and selected paddock area and draw a box around the remaining red polygons i.e inside the farm boundary area.
NB: It does not have to cover the whole property area, needs to just be a box inside the property boundary, given the property boundary layer is already active, it will select the whole property area for you.
4. Another panel will show with all the selected polygons, ensure only the Property option is ticked including the property name you are working on from the property layer you created above (untick the other group layers – e.g LGAs, States, property Names)
5. Then click the “Create feature” button down at the bottom of the attributes table on the left-hand side of your screen (Blue shaded button).
6. Check all attributes, then click SAVE
Note: To complete MyFarm property onboarding successfully - you must complete workflow A). Create property boundary base layer map and then workflow B). Create property paddock base layers steps (above ⬆️) in order in Property Onboarding. Once this is completed you can then go to tab 2. MyFarm Property Mapper: to continue to create your paddocks and complete sections 2-5 below.
2. Creating Paddocks
Use the "Edit - Split Paddocks with Cut” widget to map any enclosed polygon feature on your property. This could be a grazing paddock or exclusion area surrounded by a fence, or a crop field without a fence in the middle of a grazing paddock. It is important to understand that unlike other mapping tools that require you to digitise an adjoining fence twice, using this method only requires each fence boundary to be captured once, reducing time and improving the quality of the data.
- See the general workflow in the image below. Creating paddocks within the Property Mapper is mainly a splitting/cutting process using the 'cut' tool (scissors icon).
- Start with your farm boundary and progressively split/cut into your paddocks, ideally working from the largest to the smallest paddock.
- If you have an “island” feature like fenced off vegetation in the corner of adjoining paddocks, capture the vegetation polygon first. Make sure the start and end of the new lines overlap to fully enclose and create the polygon.
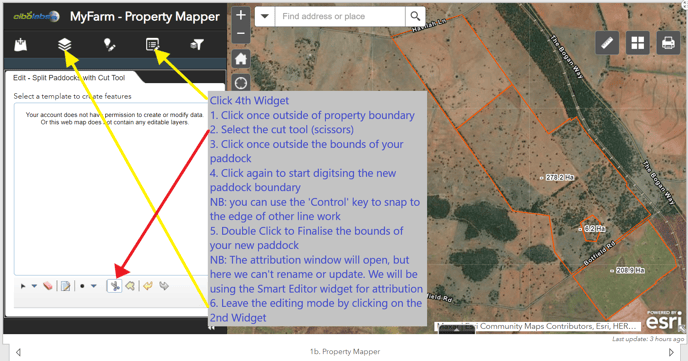
MyFarm Property Mapper- Creating Paddocks workflow and screenshot view example.
MyFarm Property Mapper Video - Part 1 - Creating paddocks.
MyFarm Property Mapper Video - Part 2 Creating paddocks and Attribute.
3. Attributing Paddocks
After you have created your paddocks you need to attribute each paddock with a name, Id (number) and land use category. Using the "Smart Editor - Create Features and Attribute” widget to start attributing:
- Click the widget icon
- Selects a paddock to attribute, turning a shade of green (ready attribution)
- Update the Land Use, Paddock Name and Paddock Id fields
- Click ‘Save’ to finalise the attribution
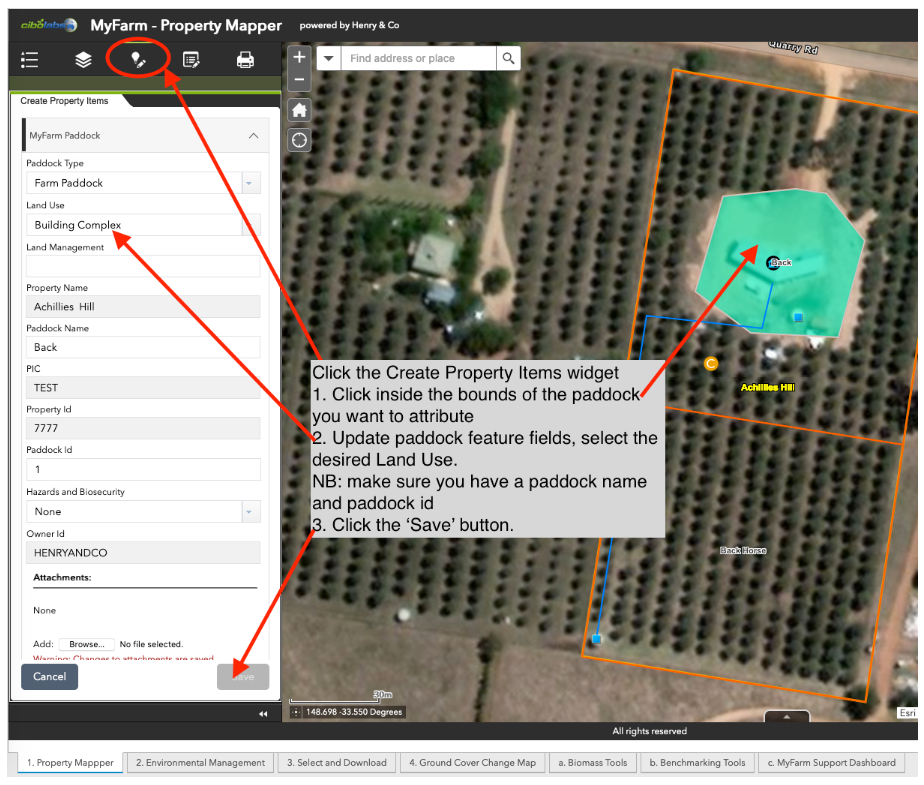
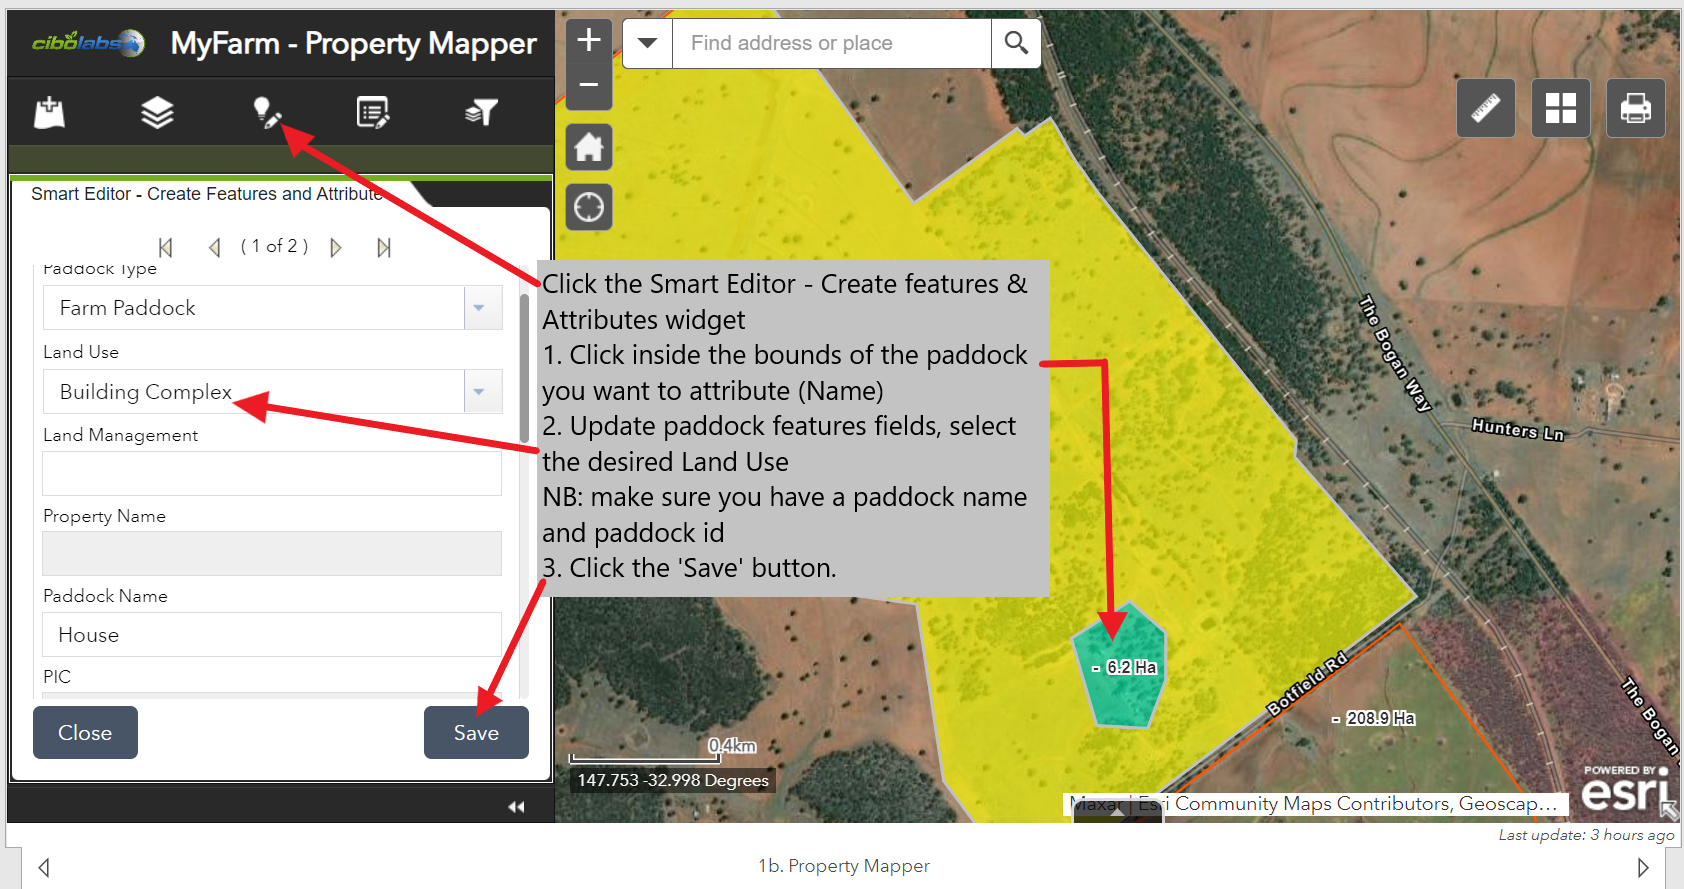
MyFarm Property Mapper - Attributing Paddocks workflow and screenshot example.
This component of the Property Mapper is for mapping infrastructure, buildings, roads, tracks, water, piping and biosecurity. The general workflow is provided in the figure below:
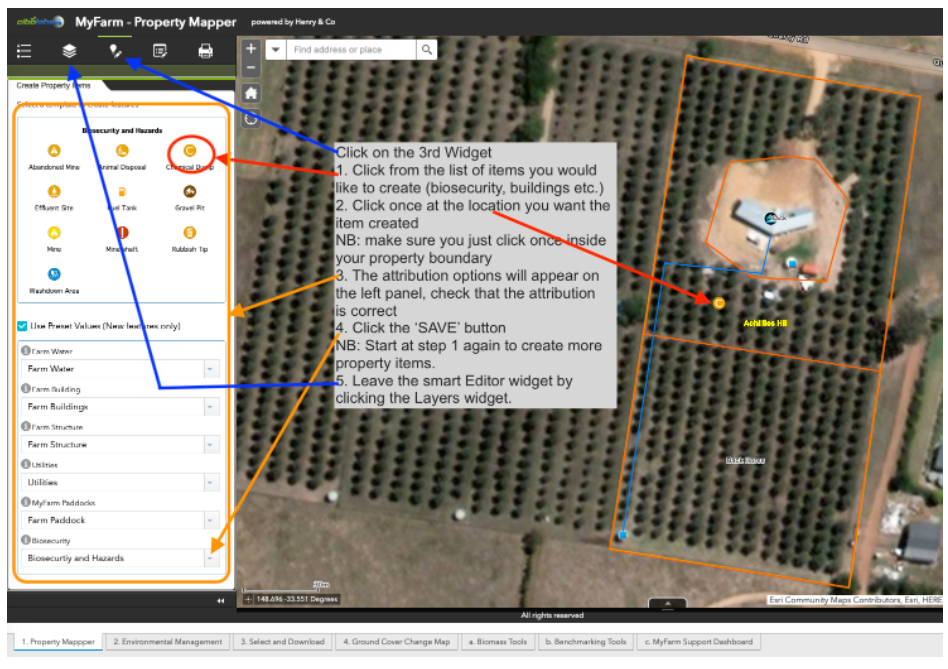
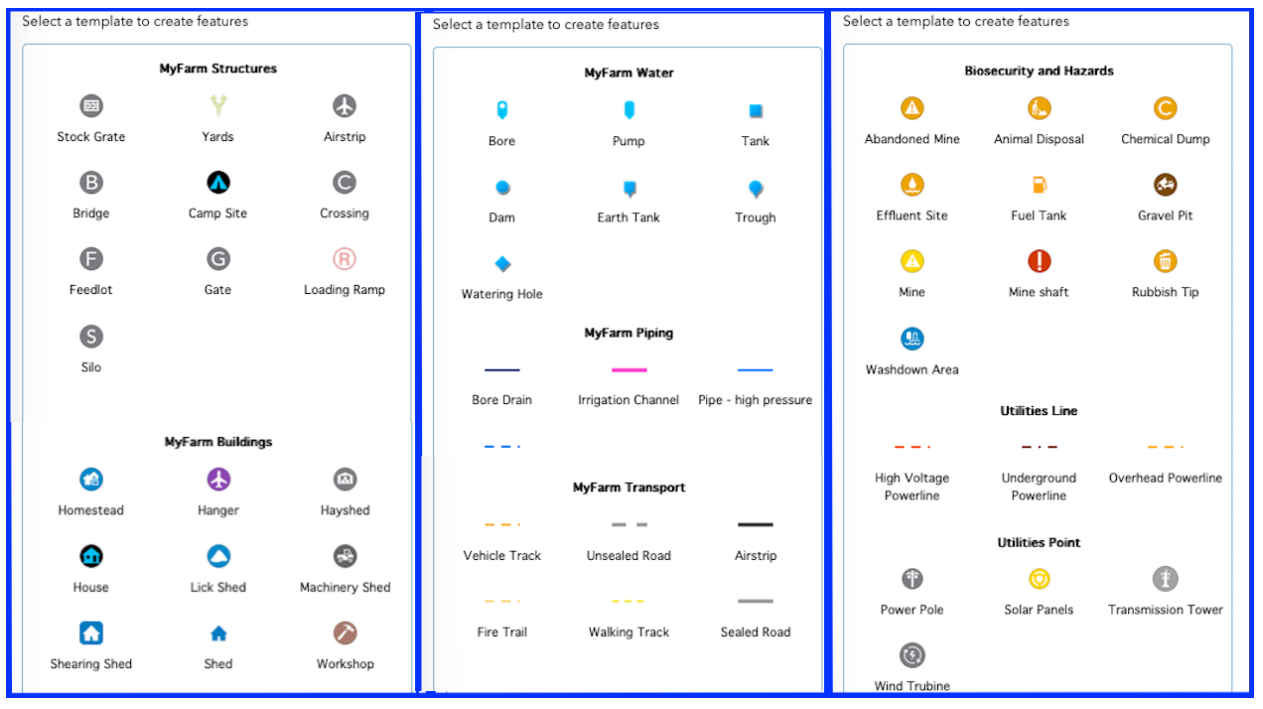
MyFarm Property Mapper - Example of feature types and symbols to add to maps.
MyFarm Mapper - Video Part 1 - Create property feature items.
MyFarm Property Mapper - Video Part 2: Create property feature items including line features.
Within the Property Mapper tab there are two print options:
- Print geoPDF - this allows the user to create a PDF file that can use with other mobile apps like Avenza Map
- Print Property Map - allows the user to create a JGP image file of the map area with all visible symbology displayed in a Legend
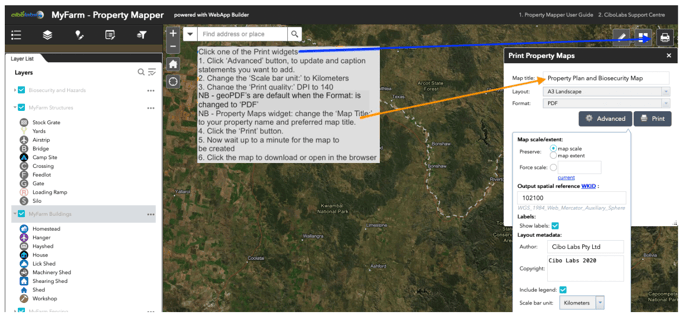
MyFarm Property Mapper - Printing workflow and screenshot view of printing widget.
Cibo Labs MyFarm Property Mapper Video - how to use printing options available on Farm Mapper
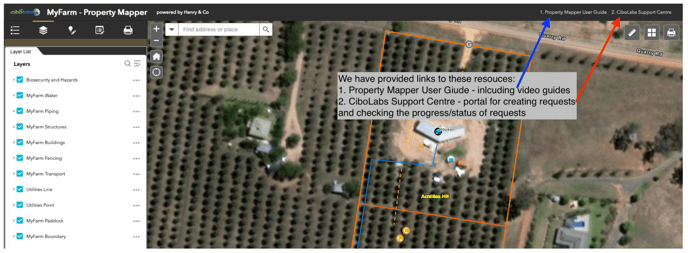
6. Support Resources
We have included some useful resources including a video on how to access further support in MyFarm Mapper. You can access the following resources as shown below:
1. Property Mapper User Guide
2. Cibo Labs Support Centre
Cibo Labs MyFarm Property Mapper Video- Using the support centre.
If you require further assistance please feel free to email support on: Send Request by Email